NoKvm是一款云计算管理平台,管理员可以通过点击按钮即时创建主机;用户可以使用非常高级的基于Web的GUI来启动、停止、重新启动和管理他们的主机。本问主要来介绍一下NoKvm如何添加管理系统授权、节点和可用IP地址,具体操作如下:
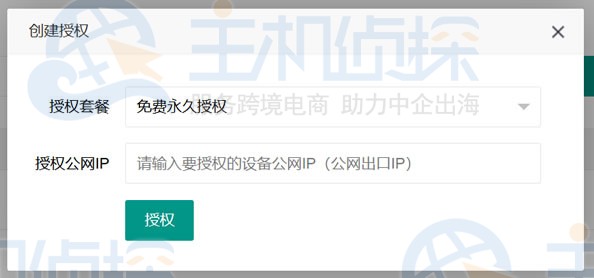
第一、添加授权IP地址
我们需要先在NoKVM官方网站(www.tasiyun.com)注册账户,然后添加授权。这里我们添加授权公网IP地址,这个是我们被控服务器IP地址。
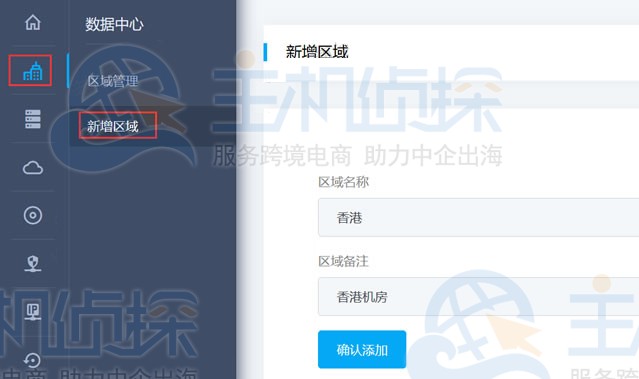
第二、添加机房区域
一般我们购买服务器的时候会看到机房所处的地区,这个我们也需要在主控面板中先添加。这里我们到主控面板新增区域。如下:
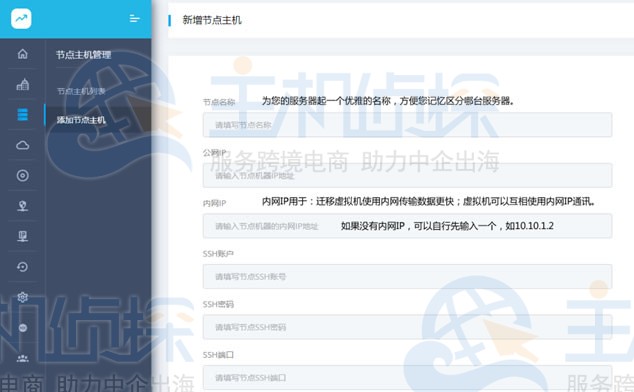
第三、添加节点
同样是在主控面板操作,添加母机信息。这里根据我们母机信息添加进来,最后面选择我们之前添加的机器所在区域。

第四、添加IP池
我们需要将服务器IP段添加进来。

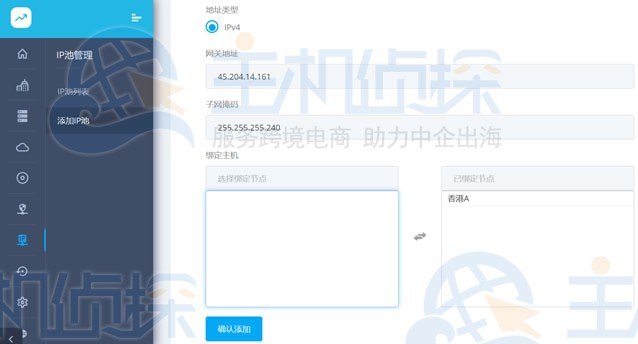
添加网关和子掩码之后就要添加可用服务器的IP地址。

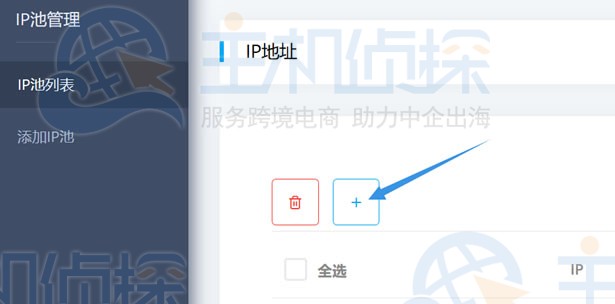
这里我们可以添加IP范围,只需要添加启始IP地址和最后一位I数字就可以连续性。

这里演示的服务器中一共就三个IP地址,一个IP地址母机使用的,两个作为演示使用的可用IP,这样添加进来。
以上就是NoKvm管理系统添加授权/节点/可用IP地址教程的介绍,大家都会了吗,后期小编会跟大家介绍NoKvm其他相关教程。
推荐:《NoKVM云主机管理系统创建虚拟机图文教程》

神马VPS


最新评论
I like this post, enjoyed this one appreciate it for posting.
Definitely, what a splendid blog and enlightening posts, I surely will bookmark your site.Best Regards!
As I website possessor I conceive the content here is very fantastic, thanks for your efforts.
I was suggested this website by my cousin. I am not sure whether this post is written by him as nobody else know such detailed about my difficulty. You are wonderful! Thanks!
Hello! I just would like to give a huge thumbs up for the great info you have here on this post. I will be coming back to your blog for more soon.
My brother suggested I might like this web site. He was totally right. This post actually made my day. You can not imagine just how much time I had spent for this information! Thanks!
I haven¦t checked in here for a while since I thought it was getting boring, but the last several posts are good quality so I guess I will add you back to my everyday bloglist. You deserve it my friend :)
I went over this website and I believe you have a lot of good info , bookmarked (:.